
Learn About Solar Panel InstallationKnowing how to install solar panels helps you save on installation costs. However, this project requires solar engineering, design, and technology knowledge. In simple terms, the average person should leave solar panel installation to professional installers.
That said, installing a solar power system in your home will reduce your reliance on the local utility company and offset your monthly utility bills. Additionally, it enables you to lower your environmental footprint, contributing to a healthier, cleaner community. This blog post explains how to install solar panels step-by-step. 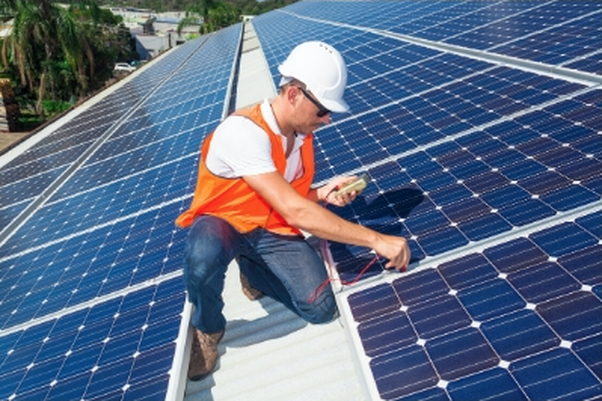
|
|
1. Site Survey
Start by selecting the solar installation company and sign a contract. This company will send a professional engineer to survey or evaluate the electrical system in your home and ensure its compatibility with a new solar system.
Depending on your location, the company may also help you acquire installation permits. The solar company will handle most of the paperwork, only requiring your signature occasionally.
Depending on your location, the company may also help you acquire installation permits. The solar company will handle most of the paperwork, only requiring your signature occasionally.
2. Order the Equipment
After the site survey and acquiring the permits, the solar installer will help you order the necessary equipment. At this point, you have picked the best solar panels for your home. Other necessities include inverters and solar batteries. The solar installation company will typically lay out these requirements in the solar proposal before you sign a contract. However, research various solar products to pick the ones that will work best for your home. Also, your solar panel installer can help you choose the best equipment.
3. Mount Installation
You'll save more if you buy solar panels in cash than if you go for leased panels. However, cash purchases might be unfeasible for you. Therefore, you can get a bank loan, combining the benefits of a lease and a cash purchase. A bank loan can reduce your upfront payment when buying solar panels. Also, it can increase your payback by a small amount. Also, consider clean energy financing that provides low interest rates. Some financial institutions or banks can also offer the same. So, you can install solar panels even if you have limited cash to buy them.
4. Solar Panels Installation
The next step is installing the solar panels on the mounting structure. The installer will tighten bolts and nuts while securing the entire system to ensure longevity and sturdiness.
5. Electrical Wiring
The installer will do the electrical wiring. Most installers use universal connectors because they are compatible with various solar panels. Also, they electrically connect solar panels with series connections and parallel connections.
6. Connecting the Solar Inverter
The next step is connecting the solar system to an inverter. Expert solar installers do this by linking the solar panel's positive wire to the positive terminal of your inverter. Additionally, they connect the negative wire to the negative terminal on the inverter. Also, they can link the solar inverter to the grid input or solar battery to generate electricity.
7. Connecting the Inverter to the Solar Battery
Your installer will connect the inverter and your solar battery. This battery is essential for storing excess electricity from your solar system. That's a general guide on how to install solar panels. Your solar panel installer's steps can vary depending on your home size and requirements. Therefore, talk to a professional solar installation company for more details.